
ePOST Serverless Email System
A PEER-TO-PEER Platform for Reliable, Secure Communications
Microsoft Outlook Express
This page describes the steps necessary to set up ePOST with Microsoft Outlook Express. In the description below, userid refers to the name you chose when obtaining your certificate, and location refers to the location you chose (such as 'rice' or 'open'). Additionally, you should have successfully launched the ePOST proxy on your machine - if you have not yet launched your ePOST proxy, you can follow the instructions on the Install page.Instructions
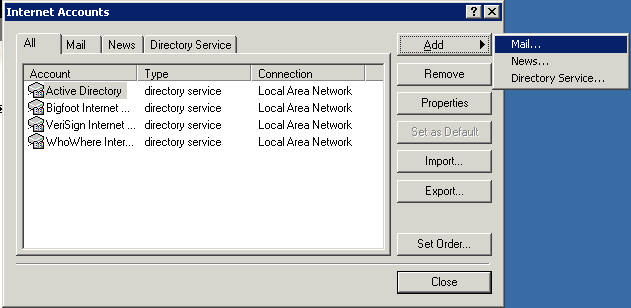
The first step to setting up Outlook Express is to start up Outlook Express and select Tools > Accounts, as is shown in the picture below.

In the dialog that shows up, create a new mail account by selecting Add > Mail, as is shown below.
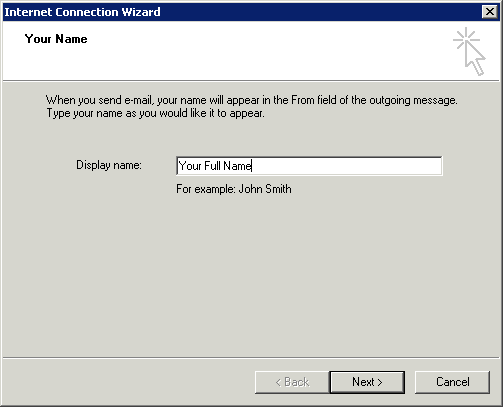
In the dialog that pops up, enter your full name as shown below:
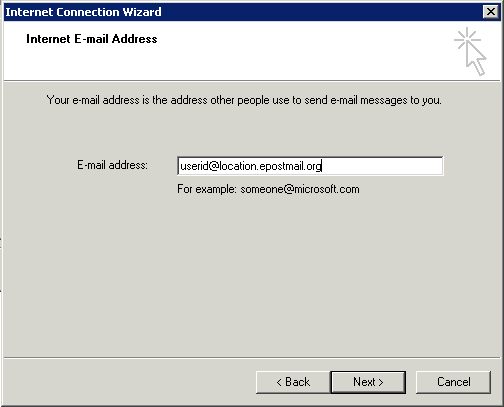
Once you have entered your name, click on Next > and the enter your email address in the form userid@location.epostmail.org in the dialog, as is shown below:
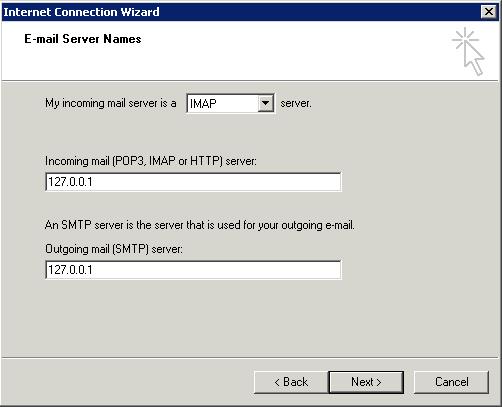
Click Next > to accept your entry. On the next page, you will need to enter the following information:
- INCOMING MAIL SERVER: IMAP
- INCOMING SERVER: 127.0.0.1
- OUTGOING SERVER: 127.0.0.1
Click Next > to confirm your entry. On the next page, enter the following information:
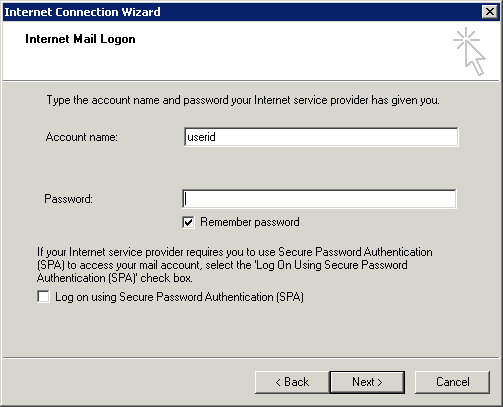
- ACCOUNT NAME: userid
- PASSWORD: password (optional)
Click Next > to accept your entries. On the final page, click on Finish to finish creating your account.
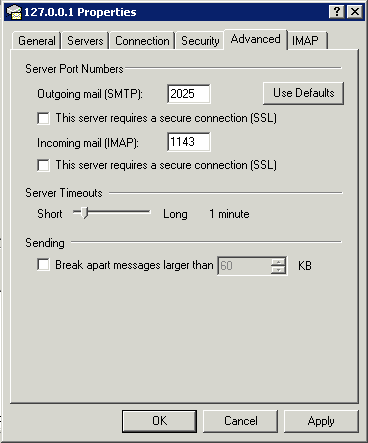
You are now almost done. First, though, click on your account in the All tab and click on Properties. In the screen that comes up, select the Advanced tab. In this tab, enter the following information:
- OUTGOING MAIL: 2025
- INCOMING MAIL: 1143
You are now done. Click on OK to confirm your changes, and then click on Close to close the Accounts window. You ePOST account should now show up in your accounts list.